Posted: 15/07/2011 | Author: quincetart | Filed under: Adapted recipes, baking, Recipes | Tags: cookies, everyday baking, moreish, playful, thanks Mum, what to do next |

Scarf for Elly
I am sorry for the dearth of posting lately. In my defense I have had a significant and much welcome upturn in my career and the previously mentioned less welcome but ultimately beneficial personal tribulations.
As part of my new work situation I have had to adjust my body-clock to a more normal daily routine and leave behind the luxurious freelancer’s world of 8.45am rising. It’s worth it to be doing fun stuff and getting paid for it but it is a bit of a shock. So, on the days when I don’t have to traipse across London at sparrowfart I still wake up in time to do so. (There is an upside which is lots of time to crochet on the train. The project in the blurry photo on the right is a new scarf for the lovely Elly.)
I breakfast bright and fresh… ok… ok… I breakfast grumpy and yawning at 6.45am and by 10 o’clock it’s definitely time for elevenses. Hence the title of this post.
So what am I having for tenses? Cooooookiiiiiies! And tea, lovely, lovely tea.
When I left home for the first time my mum gave me a load of simple recipes for the student kitchen printed on scraps of paper. I have carted them around with me on my wanderings since then and they are many of them battered and stained as all good recipes should be.The cookie recipe has become such a staple that it now lives behind the cereal on the worktop in my kitchen along with the basic sponge cake recipe. There’s no point putting them away because they’d only have to come back out again in no time.
The main reason I love this cookie recipe is its adaptability. Today I share it with you.
You will need:
100g soft margarine
150g dark brown sugar
1 egg
1/2 teaspoon vanilla essence
200g plain flour
1/2 teaspoon baking powder
50g tasty stuff e.g. chopped nuts, raisins, chocolate chunks etc
Method:
1.Grease two large baking trays. Pre-heat the oven to 180C
2. Cream together the marge and the sugar until pale.
3. Add the egg and vanilla essence, beat in thoroughly.
4. Sieve in the flour, baking powder and any powdered flavourings such as cocoa powder or spice. Fold in.
5. Stir in the other tasty stuff.
6. Spoon out even-sized teaspoons onto the baking tray and spread the mix slightly leaving a space around each to expand further as they bake.
7. Bake until firm. Personally I like a crunchy cookie so I tend to bake them until the begin to brown. Take them out sooner if you prefer more chewiness.
8. Cool on a wire rack.
Now here comes the cool bit. Although Momma’s original recipe is for a chocolate and nut cookie, I am an inveterate fiddler. I have found that amongst others you can make:
Oatmeal and raisin cookies
Remove 50g of the flour, add 50g of rolled oats and 50g of raisins and a pinch of cinnamon.
Lemon cookies
Add the grated rind and juice of half a lemon plus 50g of candied peel.
And today’s special… sesame cookies
Add a generous pinch of powdered ginger and 50g of black sesame seeds. (I’m sure white would be just as tasty but black looks prettier.)

Tea and sesame cookies
The sesame cookies are ridiculously moreish. I am getting through them at a hitherto unseen rate. (It’s also that time of the month mind.) They had a weird characteristic of being more delicious once they’d cooled than when they were fresh out the oven, which is frankly bizarre. Warm they were somehow odd and disappointing. Now they are cold though they are going down very nicely indeed with a good cuppa cha.
Posted: 15/05/2011 | Author: quincetart | Filed under: Adapted recipes, Recipes | Tags: 10k, banana bread, magic fruit, pointless whining, regents park, running, smoothies |

Baking again, mmm banana bread
Unexpectedly (unexpected by me anyway) I returned home from my first 10K run the other day with a massive bag of overripe bananas… as well as jelly legs and the hunger of the righteous. Honestly if there’s a freebie going you know I’m going to be in like Flynn.
So I wasn’t a huge fan of bananas until I started running when I was introduced to their mystical energising properties. One of the things I always had a problem with was the shopping issue. If I wasn’t running I’d want to eat one banana about every three to four days. That’s exactly the wrong length of time for my greengrocery cycle which tends to be every five days or so, and bananas’ ripening time which is too bloody quickly. I like bananas practically green for preference but they don’t stay that way for long and they certainly don’t stay that way in my very warm flat for four days. And I feel like a fool going to the shops just to buy a solitary green banana every four days. Humph! (Listen to my first world problems…)
Anyway, the run was a ball. My buddies and I stayed together and as a result were right at the back, but since it was a training run and not a charity run, we were up against some serious runners. One boy in particular seemed to sprint the entire thing, lapped us twice and was way ahead even of the rest of the best! The whole thing took place on a lovely cool but sunny morning in Regents Park. The horse chestnuts were out. A gentle breeze blew. We saw the camels in the zoo.
When we finished the nice mumsy ladies at the water stand (like a much fitter version of the WI) were giving away bananas. Of course we each had one but they had over ordered by a couple of boxes and were desperately pressing them on everyone who walked by.
“Make banana bread!” They implored.
“Y’okay.” Thought I. I returned home with about twice as many as I needed.
Then I had a busy week and nothing got done. I made pre-run smoothies with a few of the nanas. (One banana, a handful of grapes, a nectarine and a slosh of apple juice. Mmmmm….) But eventually I had to just go for it and make the bread.
There’ s a recipe on the BBC which I’ve used before but looking at it I decided it was a bit too sweet. I wanted something slightly plainer and I wanted some spice in it.
So this is my version…
- 285g self-raising flour
- 110g butter, plus extra for greasing
- 150g caster sugar
- 2 free-range eggs
- 4 ripe bananas, 3 mashed, one sliced lengthsways
- 85ml/3fl oz buttermilk (or normal milk mixed with 1½ tsp lemon juice or vinegar)
- 1 tsp vanilla extract
- a good pinch each cinnamon and nutmeg

Yay banana bread!
- Preheat the oven to 180C/Gas 4.
- Grease a 20cm x 12.5cm loaf tin.
- Sift the flour into a large mixing bowl.
- In a separate bowl, cream the butter and sugar together until light and fluffy.
- Add the eggs, mashed bananas, buttermilk, vanilla extract and spices to the butter and sugar mixture and mix well. Fold into the flour.
- Pour the cake mixture into the tin and lay the slices of banana on the top. Sprinkle with sugar.
- Transfer to the oven and bake for about an hour, or until well-risen and golden-brown.
- Remove from the oven and cool in the tin for a few minutes, then turn out onto a wire rack to cool completely before serving.
Now I may not have baked mine quiiiiiiiite long enough even though it looks a little burned in the photo at the top that’s just the photography! It has cooled and been a little over sticky. But otherwise it is just great. The nanas on the top look great I think you’ll agree. For those who want a more cake-like sweetness the original recipe calls for 250g of sugar so anywhere in that range will be tasty.
Enjoy!
Posted: 01/04/2011 | Author: quincetart | Filed under: Adapted recipes, Recipes | Tags: fluffy, frothy, oops, proportion fail, rescue mission, will do it better next time |
Proportions are funny things. It’s easy to get the a little wonky. And sometimes it’s even easier to get them a lot wonky.
I’m sitting here eating a sort of home made gelato. It wasn’t what I set out to make but it tastes quite nice and frankly I’m happy to have rescued my recipe so that’s all good.
You want to know the story of how I came to be eating an unintended gelato? Are you sitting comfortably? Then I’ll begin.
My darling mother told my darling sister and me how to make jelly whip not so long ago when she was up in town. It sounded good. She subsequently emailed a recipe which goes as follows:
JELLY WHIP
1 pkt jelly, any flavouf 3/4pt hot water
1 small tin evaporated milk – refrigerated for several hours
A 1 pint mould or dish
- Dissolve the jelly in the hot, but not quite boiling, water, and leave to set.
- When the jelly is thickening but not set, whisk the evaporated milk in a large mixing bowl until a very thick foam.
- Whisk in the setting jelly.
- Pour into mould/dish etc. and leave to set.
A variation – before stage 2: pour a quarter of the jelly into the serving dish and leave to set. Continue as above and turn out the whole thing set with a clear layer atop and decorate with fruit.
Being my mama she entitled her email “jelly whip” and started it with the phrase “Let’s see what your spam-check makes of that title.” ! I love you mum!
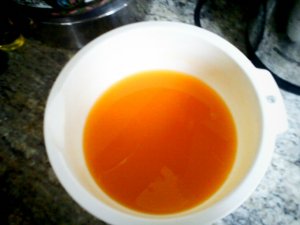
Peach juice and gelatine
It sounds like a piece of cake to be honest and readily open to adaptation so I thought I’d have a go at the posh version. I had a tin of evaporated milk in the cupboard so I stuck it in the fridge overnight. I coudn’t remember ever seeing a smaller evaporated milk tin, this one was regular tin sized so I assumed that’s what the recipe meant. Ahem.
I wanted to make a peach jelly so I bought some peach juice from the corner shop and set to with the gelatine. I got the quantities a little off using the full pint of peach to make the jelly but I reckoned that would probably be ok. BTW I should emphasise the importance of not playing fast and loose with the instructions on gelatine packets. You can end up with some really nasty stringy, lumpy, goopy messes if you do. Even I try very hard to stick to the rules with this stuff.
While it was setting I went for it with the whisk and the tin of milk. Not every recipe I make involves whisking but somehow I’ve been doing quite a bit of it lately. Things come in phases I guess.

Just beginning whisking the milk
I was pretty amazed by how much volume can be created so easily in this process. The milk fluffed up like nobodies business. It was fun. But I began to become a little concerned…
Because I realised that of course this was not a small tin of evaporated milk. This was probably double the size of a small tin. As I whisked some more and the milk expanded further I thanked my lucky stars for the size of my mixing bowl and started to worry properly that I hadn’t made enough jelly to properly flavour and set the milk.
When I whipped in the jelly I knew I was right. There was barely any flavour except a slight souring of the milk.
Bleugh!

Frothy and fluffy
I didn’t have much more peach juice and I didn’t trust it to provide enough flavour anyway. I needed to think of something else. Meanwhile time was ticking and what I had already made was setting.
Gah!
I rifled through my various cupboards rejecting spices and colourings and inappropriate alcohol until my fingers grasped a bottle of almond flavouring. Aha! I don’t know if you’ve had fruit- almond combinations but can I recommend amaretto and orange juice as a good way to start exploring them. Add a good dash of lemon juice if that sounds too sweet.
I made up another jelly with the remaining peach juice and poured in a goodly splash of almond flavouring. I poured it slowly at height into the milk to help cool it on its way in. In it went but the flavour was still too mild.
More almond. Still not much flavour. More almond… meh, stil a bit bland. More almond and now I’m worried about overdosing on almond essence, but at last I have something that tastes good.
Oh and I should also mention, could fill a small bathtub.
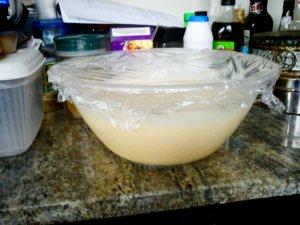
Big bowlful of jelly whip
Yes, in my drive to finish making the stuff I had left aside all sense of proportion and allowed myself to create a dessert that would occupy 3/4 of the space in my fridge.
Clearly it was time to call in the professionals.
Once it set I got on the phone to my sometimes fella and put in a plea. “I need my fridge back! Will you help?”
He was on the bus practically before I’d finished the call.
Between us we got through about a third of it straight off.
That sounds like a huge amount but it really is mostly air. His comment was that he had never eaten anything so light and fluffy. I blended some frozen berries to go with it which was a good call. (Sorry no pictures of this. It was yummy and we snaffled it before I remembered to take any.)
When he left I packed him a boxful to take home. It was set quite successfully and didn’t collapse on the journey.
I wasn’t sure I could eat the rest before it went off but it occurred to me that it might freeze ok. And I was right. It’s slightly chewy compared to, say, ice cream, but still very nice.
I definitely want to try to make this again but next time I will definitely search around for a small tin of milk. I will also use a stronger flavour of juice to make the jelly. Cherry I think would be nice or perhaps ditch the juice altogether and make it with coffee.
Anyway, I will get back to my thawing pudding and look forward to hearing about your last minute rescues. What have you made that required quick thought and a splash of something out the cupboard to sort it out? Tell me in the comments.
Posted: 12/03/2011 | Author: quincetart | Filed under: Adapted recipes, Recipes | Tags: baking, chocolate, dessert, electric mixers are handy, faff, orange, pudding, totally worth it |
We have had a request! The fabulous owner of Yarn To Knit has asked for my chocolate and orange pudding recipe, and well she might as this is one of the successes of my year to date. This is an adaptation of Nigel Slater’s sponge pudding in its own sauce and is a bit of a faff to make but totally worth it.
I have this lovely lady to thank for introducing me to the original. I don’t tend to return to recipes over and over unless they are a base recipe from which I can improvise but this one is just so gorgeous that I have made it several times over and have only just thought to add the chocolate.
Be warned before you begin, you will need lots of bowls and hence a good washer up. I suggest bringing this to the table and refusing to serve it until you have extracted promises of dishwashing from your family.
The quantities given make a very large pudding so I usually halve them.
This should be enough for six:
softened but not melted butter 100g
caster sugar 175g
oranges 3 small fruit
at least 70% cocoa solids chocolate 6 squares
eggs 4
proper cocoa powder (not drinking chocolate with sugar and milk added) 40g
milk 400ml
Cream the butter and sugar together until very pale and aerated. Nigel suggests a mixer for this. I’ve never felt the need to buy one so do it by hand.
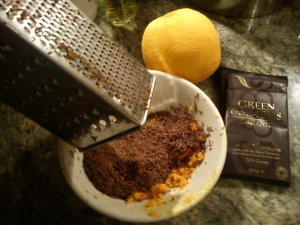
ZOMG you have no idea how good this smells
Put the oven on to gas mark 4/180C (my oven is fan assisted and tends to run high so I put it on 160C).
Grate the zest of the oranges, avoiding the pith. Then cut them in half and stick them in the microwave for 30secs, this helps you with the next step, squeezing the juice out. Grate the chocolate.
Clean inside of grater with fingers.
Lick fingers.
Wash fingers.

Butter, sugar and egg yolks, creamed but not curdled
Separate the eggs and add the yolks to the butter and sugar. Nigel reckons it should curdle right now but mine never does. It waits until a couple of stages later, then it curdles. He also says not to worry about it so I never have.
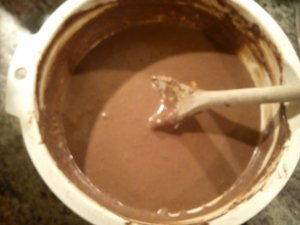
Usually this is a lumpy mess. I blame you guys!
Slowly and gently add the milk and cocoa powder alternating bit by bit. I bet it’s curdled now hasn’t it?
Except if you’re taking photos of it for a blog post, then it’ll be almost televisually smooth! Mix in the grated orange and chocolate then the juice. The batter should really soft, almost sloppy and not look particularly appetising. Never fear Nigel knows his puddings.
Beat the egg whites to stiff peaks. Now I regret not getting that electric mixer. It would be handy. Still, feel my right bicep! Grrrrr! I’m like Popeye on one side and Olive Oyl on the other.
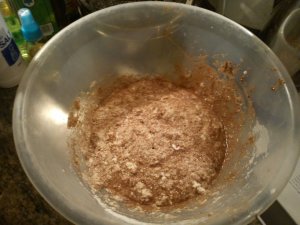
Yay! Mud pies!
Gently, gently fold the egg whites into the batter. You don’t want to knock the air out of them.
Pour the whole lot into a tallish oven proof dish so that it comes about halfway up the sides.
Put that into a pan filled with hot water high enough to come halfway up your dish.
Carefully transfer the whole lot into the oven.
You now have an hour on your hands. I suggest you crochet. Or y’know, start on the washing up if you’re one of those horrible organised people.

Fresh out the oven
After an hour test the top of the pudding which should feel ‘spongy’. When removing it from the oven be super careful with the boiling water in the roasting pan. I once nearly poured it all down my stomach. That would have made my dinner party memorable…
Leave it to cool for as long as you can stand. I can never wait nearly long enough and I burn my mouth every time.

Mmmmm chocolate orange goodness....
Enjoy!


